

- Master Chief Skin Guide - June 15, 2022
- Skye Fortnite Skin Guide - May 24, 2022
- Guggimon Fortnite Skin Guide - April 22, 2022
Fortnite, as well as all the shooters, rely on your accuracy to win. Of course, there are other factors like knowing to build properly or knowing your surroundings and know how to move, but you’ll have the upper hand if you have a very good aim.
Fortnite just comes down to landing the shots; if you don’t dominate that, you’ll have a bad time dying over and over again when starting the match.
So, if you are struggling with the aim and want to improve your shooting accuracy in the game, I have some tips that will help you a lot.
The first thing you need to know is what you have to improve to achieve a better aim.
Aiming
Tracking
To have a better aiming, first, you have to learn how to track somebody. Tracking is an important factor that all the shooting games have and are the main reason people fail their shoots. Thanks to a proper tracking, we can:
- Know the exact position of an objective and know where they are moving.
- Have a quicker mouse movement.
- Have more chances of surviving a 1v1 as proper tracking will lead you to land your shots.
- Have a perfect close and mid-range performance.
- Have a decent long-range weapon (like rifles) usage in short distances.
- Know how to deal with objectives in movement, which is important in Fortnite.
As soon as you dominate the tracking, which is the most important part of having excellent aiming, then you’ll be ready to go.
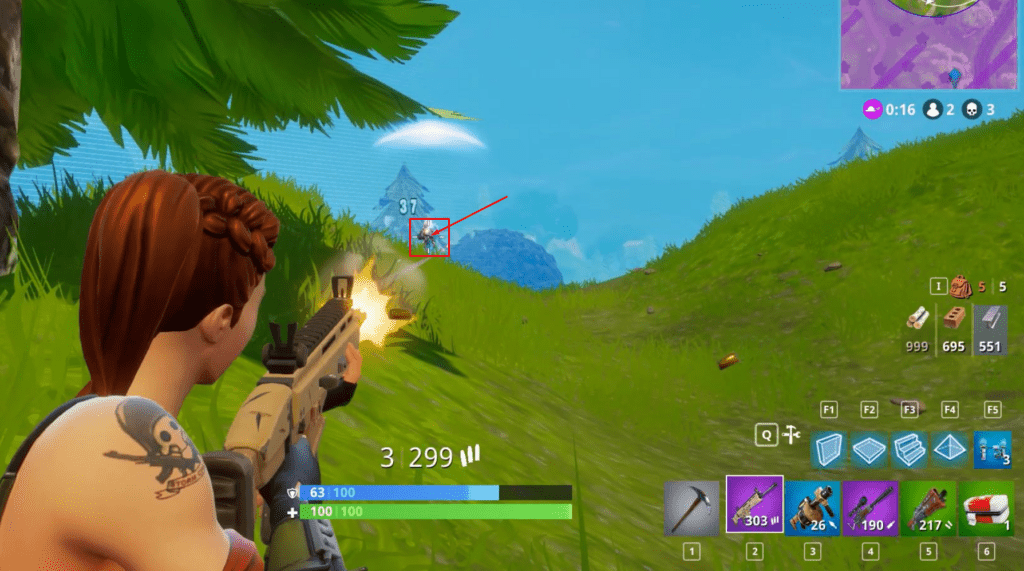
There are two kinds of shots in Fortnite, the Hip Shots and the Aim Shots.
Types of Shots
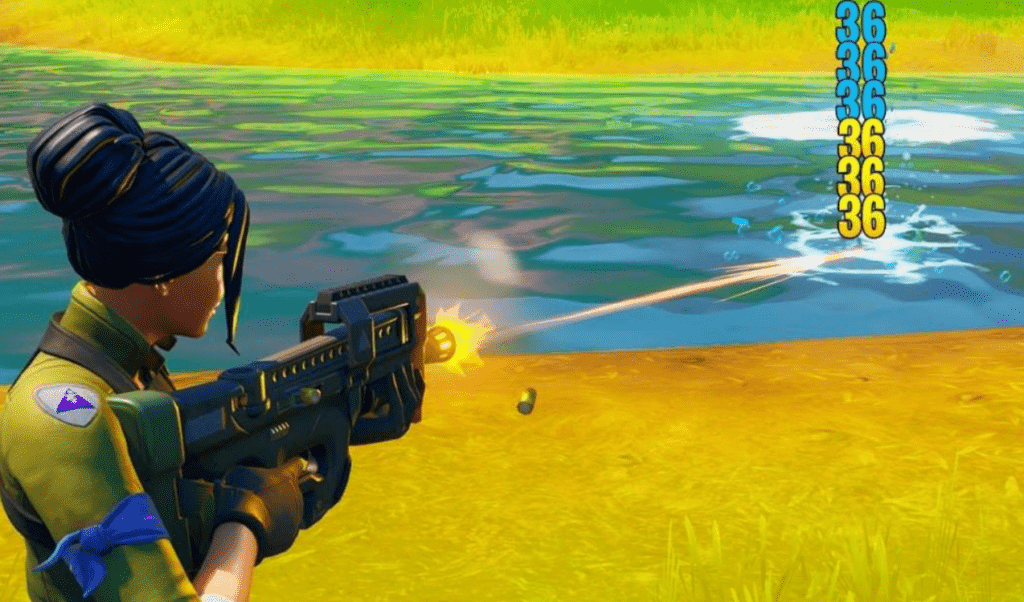
Hip Shot
The Hip Shots are the ones that you do without using the scope. They tend to fail at long distances but are the best option while battling on close distances.
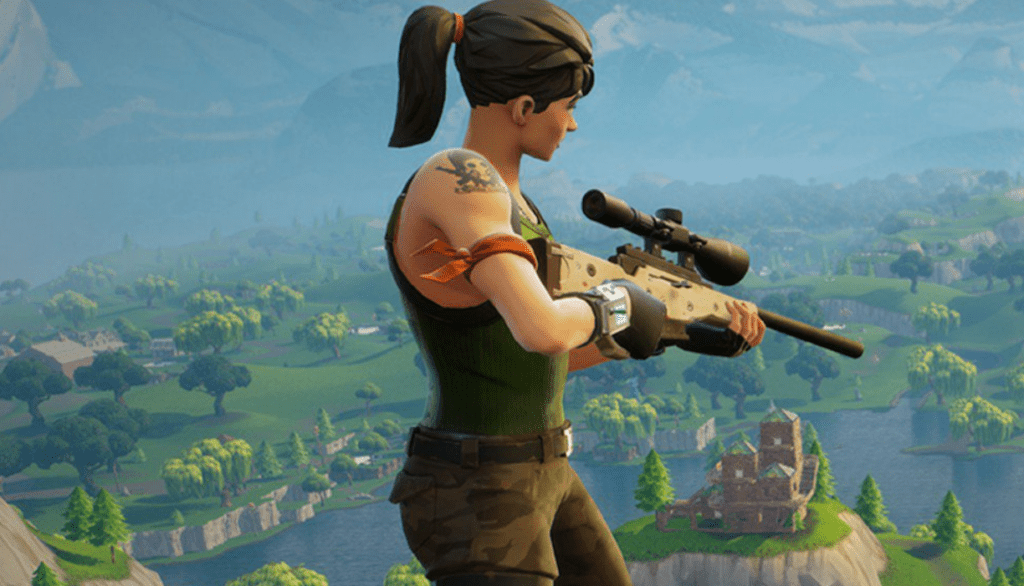
Aim Shot
The Aim Shots are the ones you do when using the scope and are the best option for long distances, like when you see an objective running on a hill, camping, or healing themselves.
To have a proper aim, you have to know when to use a type of shot.
For example, it’s way better to use a Hip Shot when using a shotgun while battling in a 1v1 at close distances, as if you use the scope, then your vision of the objective will be limited to a certain space. Also, if the objective is constantly jumping, you’ll lose track of them.
And, of course, you’ll not use a Hip Shot when you are defending a space or having the upper hand in a long-distance battle against another crew.
As you can see, it’s more than just moving your mouse into an objective’s head and shooting; you have to have control over what you do to win.
There are certain tips I can give to you if you want to perform better and improve your shooting accuracy. The first one is to know yourself and your surroundings.
Knowing Yourself
The first thing you need to know is about yourself and your gaming space because it is very important to be comfy while playing.
This tip is for Fortnite and every game you play; be sure you have enough room on your table to put your arms and feel comfortable. If you don’t feel like it, you won’t even enjoy your game.
And now, about yourself. There are two kinds of Fortnite players:
- Nervous Players: These are known for getting nervous when being in stressful situations like doing a 1v1 or being about to end the match. This can mess up their aim if they are trembling, making them move their mouse more than usual.
- Calm Players: These players have proper control of their nerves, which means they have better control of their mouse. These players don’t get highly nervous when facing a hard situation and make better decisions, but sometimes struggle when they need to aim quickly.
Both types are valid in the game, and being a Nervous Player doesn’t mean you can’t win a 1v1 duel. Recognizing your shortcomings is very important as you know what you have to improve.
Knowing Your Equipment
Sometimes you can listen to “pro-players” saying that the PC, mouse, and keyboard are all you need to be good, and I don’t think like that; you can be bad at aiming even if you have a Logitech G502 and a Razer Huntsman with the best PC you can imagine because is more than that.
I have seen very good players playing with Playstation controllers and cheap mice, and I have seen players that miss their shots constantly while playing with pro-player equipment. The key to that is knowing what you have and working with it.
Before lurking into the settings, first, try to adapt yourself to your peripherals. This can do two things; you can get better at aiming as you are constantly practicing or diagnosing which kind of player you are and what you need to stop failing shoots.
If you get too uncomfortable when playing because of a sensitivity that doesn’t suit you, then it’s time to get into the Fortnite settings. But before getting into a match and starting to set your sensitivities while playing in a battle royale, I recommend you step into an Aim Practice Map.
Aim Practice Maps
I know the Aim Practice Maps can be boring sometimes, and the best practice is to get into a match and start playing so you’ll get good eventually, but I only use these to set the configuration I’ll use and polish my biggest flaws.
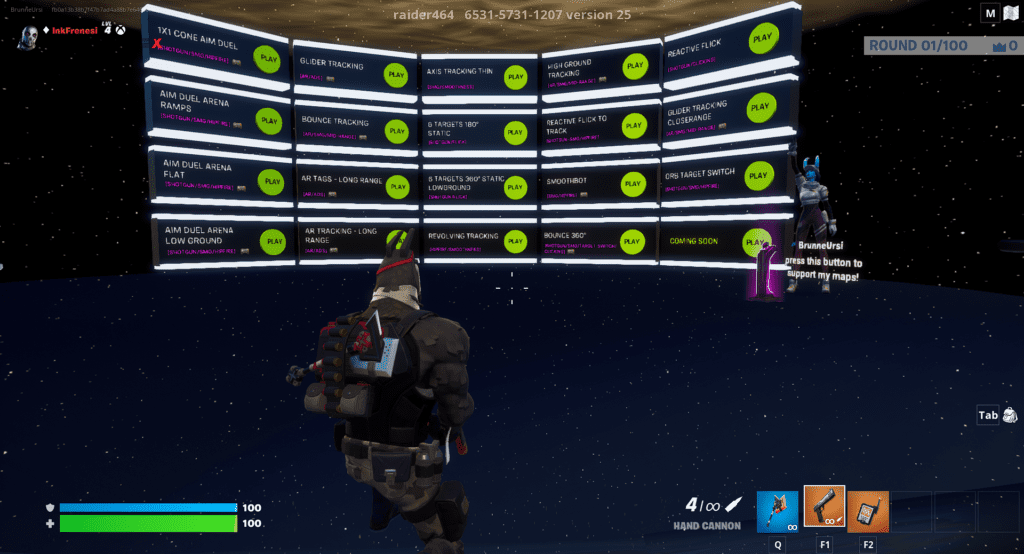
So, there’s a map that I love to use as an aim practice, and I get there sometimes to polish some things that I don’t get. It’s named Raider’s Solo Aim Training Map by Raider464, and it’s perfect for what you need to get better at aiming.
The Island Code to get the Raider’s Solo Aim Training Map is 6531-5731-1207.
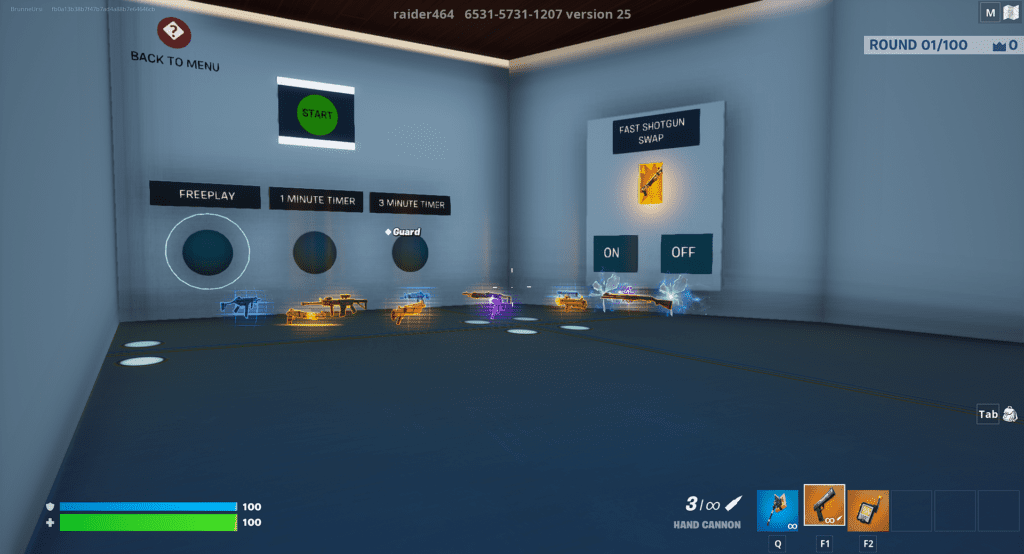
I recommend this map because it has all it takes to practice Tracking, Hip Shots, and Aim Shots. So let me introduce it to you. As soon as you download the map and start playing, you’ll get to a lobby where you’ll see a lot of options:
Every option will take you to a second lobby where you’ll be able to choose if you want to play freely, with a minute timer or with a three-minute timer, like this:
So, I’ll briefly explain which room will help you get better at Tracking, Hip Shots, and Aim Shots.
Side Note: The Map has some weapons used in previous Chapters because it is a map focused on training with weapons from Season 3. I recommend you to use the weapons of the current Chapter as they will be the ones you’ll be using in the matches.
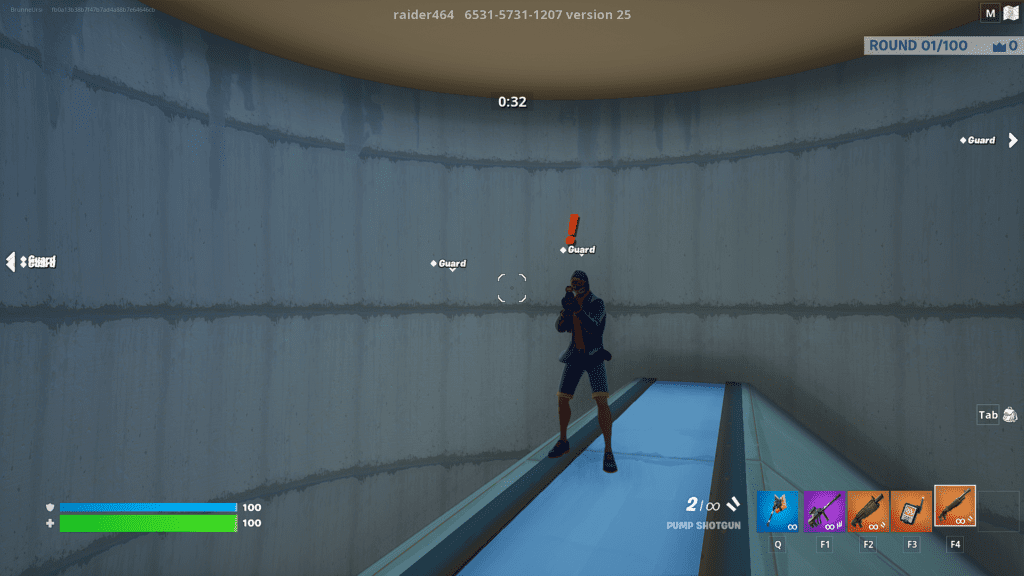
1×1 Cone Aim Duel, Aim Duel Arena Traps, Aim Duel Arena Flat, and Aim Duel Arena Low Ground work for the same; close-range duels to practice Hip Shots and Tracking with the shotgun. In these maps, you’ll be in a closed space against a bot (or two in the case of Aim Duel Arena Low Ground) that will constantly be jumping, and your work is to shoot at it. You can even kill them or land shots while standing on the same spot, but the exercise is also designed for practicing your movements in 1v1 duels, as you need to get away from the bot as much as you can to land some shotgun or rifle shots.
Glider Tracking and Bounce Tracking are very simple; they will lead you to an empty space where you’ll see some bots gliding or bouncing, and your objective here is not to lose focus on them. Afterward, you can try to land shots on them, which is hard but accomplishable. The trick is to take a rifle and wait for them when they fall.
![]()
Ar Tags – Long Range is to practice your Aim Shots from very long distances. The objectives will be moving, but you’ll be standing, so your challenge is to land as many shots as possible.
Ar Tracking – Long Range Works for both Tracking and Aim Shots as you’ll be moving while your objective also does, so you only have to follow them with the scope. Landing shots is very hard, but you can also try it!
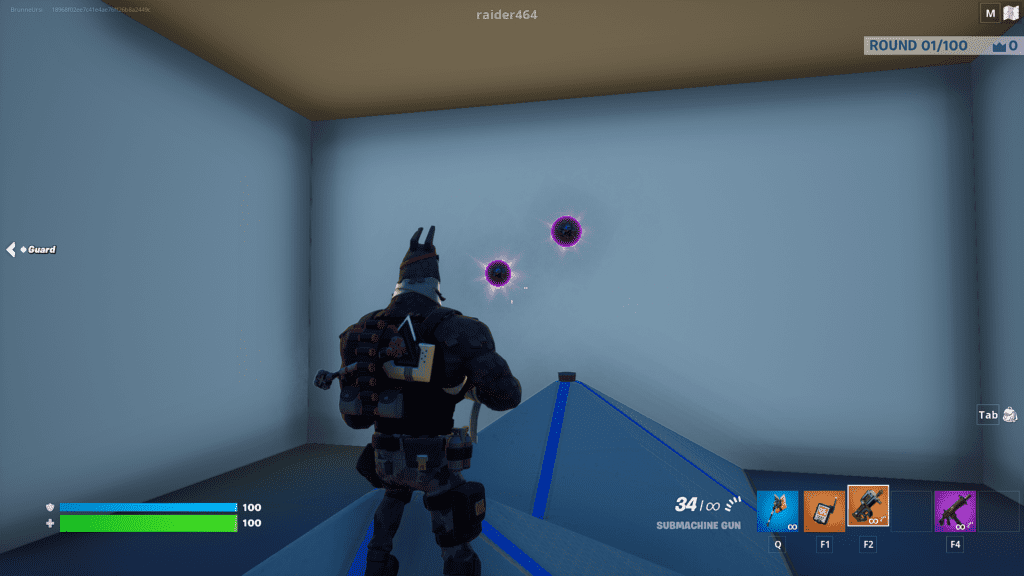
Axis Tracking Thin and Revolving Tracking are to practice Tracking and Hip Shots with SMGs. In the first one, you’ll be moving, and your objective is to track the red pole, while in the second one, you’ll be moving in circles, and, again, your objective is not to lose the pole out of your sight. Of course, you can also shoot the poles, so that’s an extra challenge!
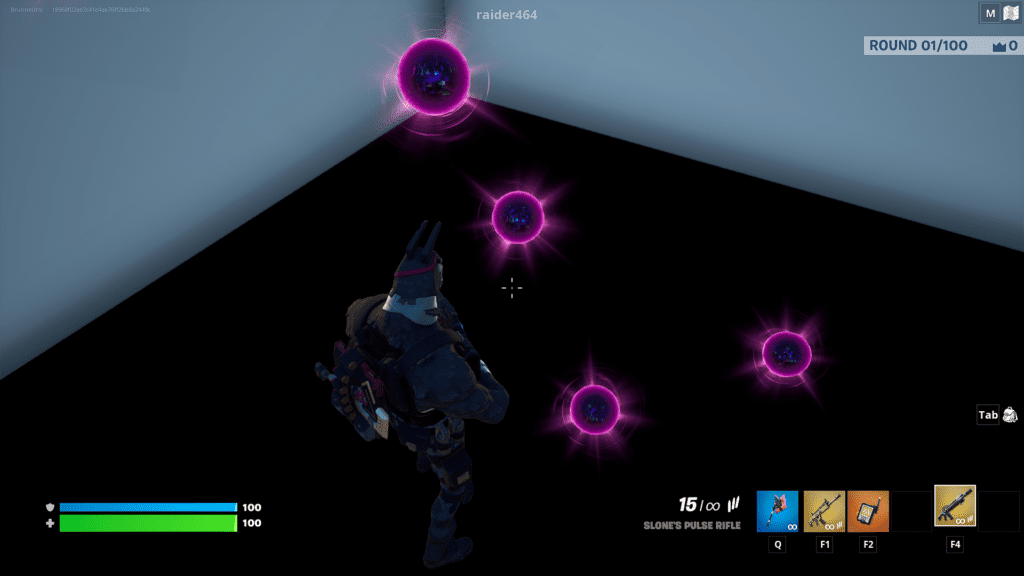
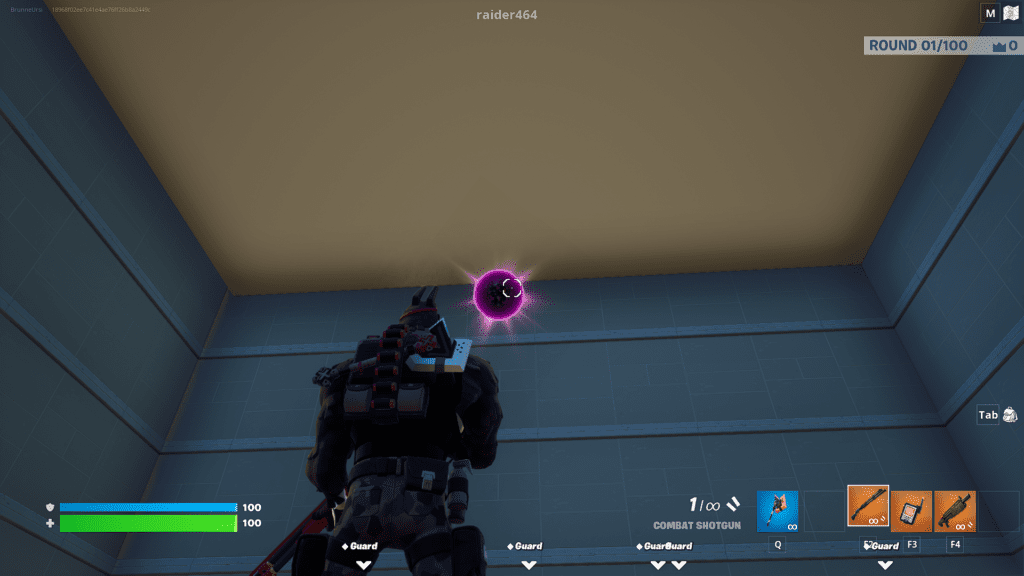
6 Targets 180° Static and 6 Targets 360° Static Lowground are for practicing Hip Shots with rifles. This is very important to practice as there will be moments when the only thing you have available is a rifle, and you need to be into a 1v1 fight. So the objective of these two rooms is to shoot at the purple orbs with some rifles.
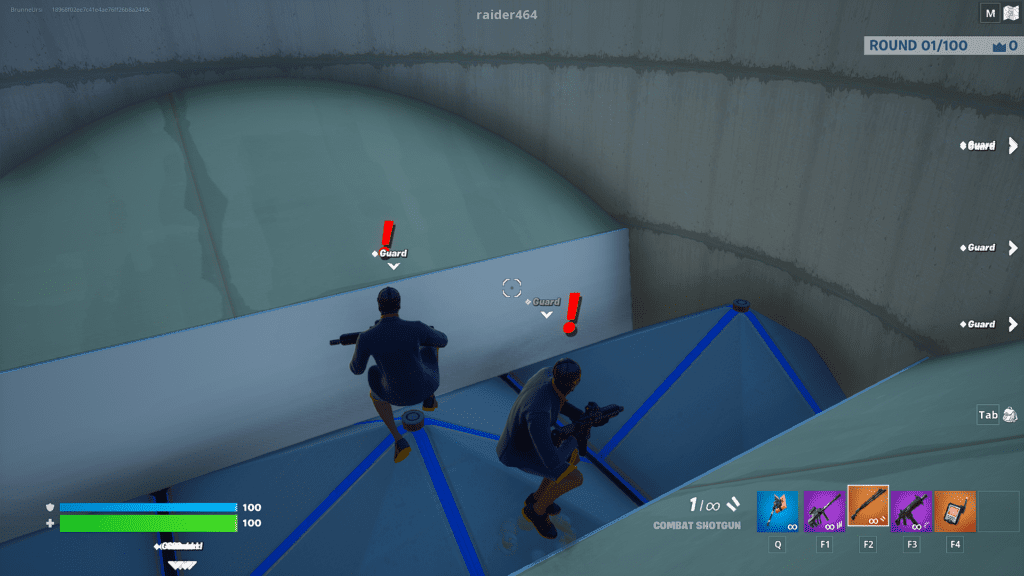
High Ground Tracking is a very important exercise as you’ll need to control your objective tracking when being on high ground as it means having clear shoot spaces that can make you win a match. In this exercise, you’ll get into a room with some bases. One of them will randomly explode, so you have to move your sight to the base and follow the objective, and, if you can, land some shots on it.
Reactive Flick to Track will place you in a room with a shotgun and a purple orb. Your task is to shoot the orb; this will make you fly in the air with an SMG to practice tracking in movement with SMGs.
Smoothbot will teach you to use the opportunities you have to shoot with SMGs in close and mid ranges, so it’s to practice Tracking and Hip Shots. Bounce 360° is for the same but with some more weapons and more bots to shoot at.
Reactive Flick is to practice Hip Shots with Shotguns. It works like Reactive Flick to Track, the same room with a purple orb that, as soon as you shoot at it, it’ll make you fly, and you have to hit it again.
Glider Tracking Close-range will put you in a room, and you only have to track some objectives, like in Smoothbot, but in this case, the objectives will be gliding. Shooting gliding objectives is a very hard skill to practice, so if you have it, you can have the upper hand on those players who escape from a situation with their gliders.
Lastly, Orb Target Switch will help you practice Aim Shots with SMGs, which is important because of the weapons‘ recoil.
Now that we know the rooms of this map, it’s time to start practicing and calibrating the sensitivity on your peripherals. Of course, you can try to use the standard settings, but if you feel very uncomfortable with them, it’s time to make some changes.
Settings
Mouse and Keyboard
These are the Mouse and Keyboard settings:
Here, you’ll see two important elements; X-Axis Sensitivity and Y-Axis Sensitivity. You want to keep these two in the same value as it’ll help you better control your movements. These are the general movement speed on the camera.
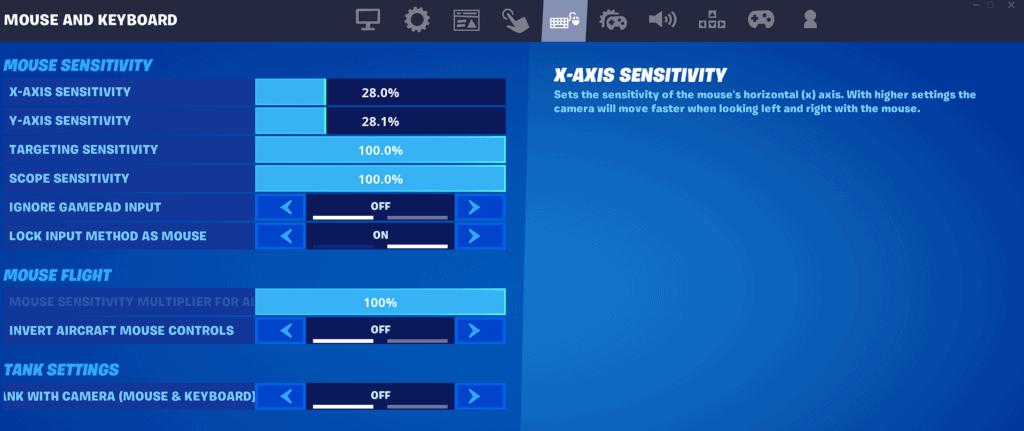
If you tend to move your mouse a lot when playing, it’s better to have this value very low. 28% is the standard, but you can take it a bit lower, even to 20% but in cases when your arm movement is heavy.
Now, Targeting Sensitivity is for when you are not aiming; exactly, for controlling the Hip Shots. If the value is 100%, the camera movement will be the same as the one you have for X and Y-Axis Sensitivity. If you lower it, then you’ll have a slower camera movement when holding a weapon. I recommend slowing this one a bit if you move your mouse a lot and letting the value at 100% if you are a Calm Player and your mouse movements are slow.
Scope Sensitivity is for the camera movement when you are using the weapon’s sight. I usually mirror the Scope Sensitivity value with the Targeting Sensitivity value. Still, if you struggle a lot with tracking objectives in long ranges as the movements are too quick, then you can lower this value to a point where you feel comfy.
Controller
The controller settings are easier to configure as you only have two options; Look Sensitivity and Aim Sensitivity. They aren’t heavily customizable like the Mouse and Keyboard settings, but at least you can change them, which is something great to have.
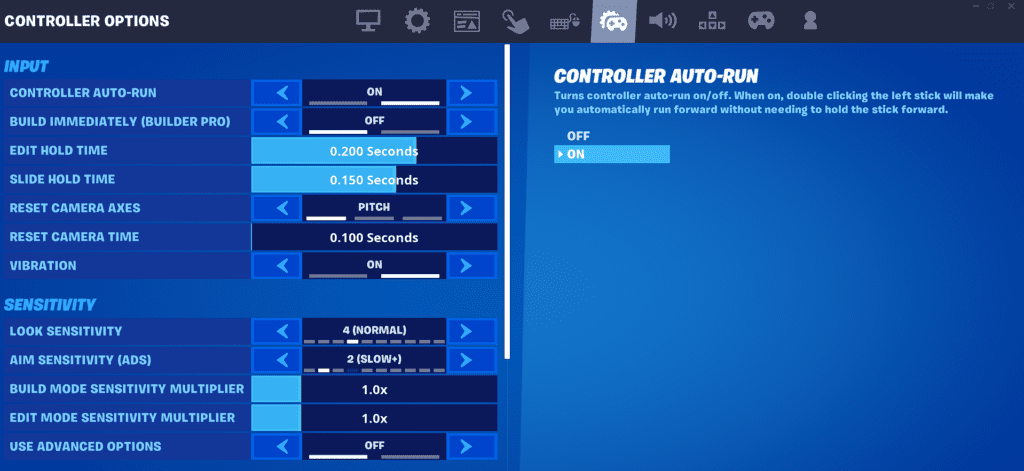
You’ll see that Look Sensitivity and Aim Sensitivity have values from 1 to 10; it’s a thing to see which one suits you better. Of course, I don’t recommend Insane, but this has to be your choice. If you are slow when tracking objectives, you have to increase the value up to a point when you feel better, but if the camera control is very hard for you, then you’ll have to decrease the value.
As for the Build and Edit Sensitivity multipliers, I don’t recommend moving these from their standard value unless you are very slow or fast with your building movements.
FAQs
Question: What are the best settings in Fortnite?
Answer: There are no perfect aim settings in Fortnite as all players are different from each other when it comes to aiming. But, there are the best settings for you, and those will be the ones you have to discover by getting into the matches and detecting what you can and can’t do.
Question: How can I improve my aim in close ranges?
Answer: The best tip I can give for these moments is to stop shooting like crazy and improve your tracking methods by following the enemy with your weapon. Go for Hip Shots if not using a Shotgun, and you can go with Aim Shots or Hip Shots (as you prefer) if using a Shotgun or a Pistol. Also, don’t get crazy by shooting randomly; wait for your moment and always have your shields properly charged.
Question: How can I improve my aim in long ranges?
Answer: The first thing you need to do when shooting at close ranges is always to do Aim Shots. Next, if you need to be aware of your surroundings, go for Hip Shots while being crouched, as crouching will reduce the recoil in the weapons. Lastly, try to get the high ground; it’ll be hard for your enemies to land a shot on you while you’ll have some better opportunities and vision to battle.
Conclusion
The first thing I want to mention is that there are many web pages that recommend buying better equipment if you want to improve and, even if that’s right, if you can’t buy better equipment, you can still get better at the game by practicing constantly.
Lastly, the best way to put into practice all the things you learned with the Aim Practice Map is by playing the game. You eventually will get better at the game if you are constantly playing, so don’t get mad if you don’t land your shots; just try again and remember that this is just a game.
For more interesting readings check out: