

- Master Chief Skin Guide - June 15, 2022
- Skye Fortnite Skin Guide - May 24, 2022
- Guggimon Fortnite Skin Guide - April 22, 2022
I’m an avid Fortnite gamer and Creative Mode enthusiast. While I spend most of the time playing the ever-popular 3v3v3v3 format in Creative, I’ve had plenty of experience creating maps of my own and exploring in Creative.
Here’s what you need to know to get started with Fortnite Creative.
Fortnite Creative – What is it?
Creative mode in Fortnite enables players to create games and mini-games within Fortnite. This includes creating customized maps and matches within the game environment in Creative Mode. Players can then share these custom-made maps and mini-games with friends and the larger community in Fortnite. It’s similar to Minecraft, allowing players to build to the extent of their imagination.
How to enter Creative
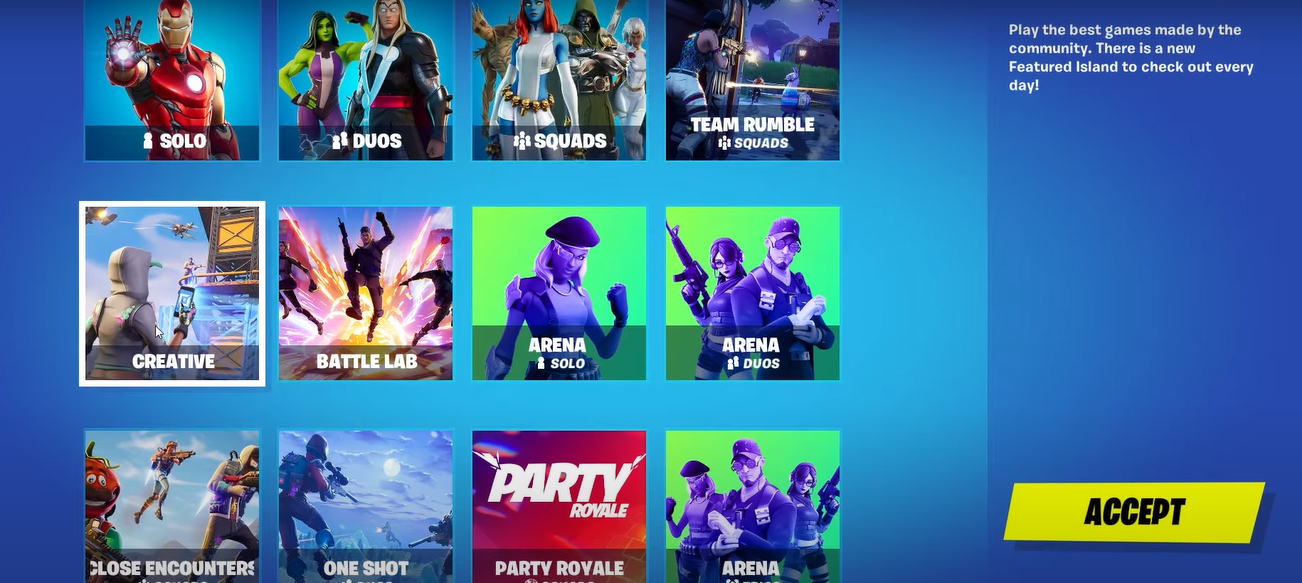
The option to enter Fortnite Creative appears when you boot up the game and are given options to select game mode. Alternatively, if you’ve loaded into the Battle Royale lobby already, you can find the option to change to Creative right above the play button, you can select the ‘Creative’ option and click play to get started.
Building, Creating, and Constructing in Creative
You need to start a server. After the screen loads, you will find yourself in the Creative Hub, which will give you the option to go to a ‘rift’. This will enable you to ‘Create New Island’, allowing you to select from Starter Islands and Template Islands. Select any of the Starter Islands to get started. Name your Island and wait for the rift to load, and walk through the rift to travel to the island you just selected. Here, you have the same controls for movement as in Battle Royale, along with access to unlimited materials to build on your Island.
You want to switch to your AR Phone here. The AR Phone is what you use throughout the Creative experience to place, edit, remove and interact with the different elements, props, and prefabs that you place on your Island.
It’s best to double-tap jump after this step, as it will allow you to glide through the map, making movement and designing your island much easier. Holding the jump and crouch keys will allow you to change your elevation.
You can now decide where you want to start building from and what type of map you want to create.
Prefabricated Structures (Prefabs)
At this stage, you can add props and elements to your Island. The Creative inventory will allow you to lay down a variety of elements that you can then place on your map. This includes the buildings, structures, and asset packs that can be found under the Prefabs tab. You can also find vehicles, traps, and similar items under the Devices tab. You can select a Prefab and click Equip, which will give you the option to place the structure anywhere on the map. Once you select an asset or object to place, it will be added to your inventory, next to your Pickaxe.
Similarly, the Galleries tab consists of a variety of props under numerous galleries that you can place on your Island.
You can left-click to place a prop that is attached to your AR phone. You can also copy-paste and cut-paste props that you have already placed on the map, for ease of construction and placement.
The Creative also allows for fine-tuning such as rotating a prop before and after placing it.
Controls
There’s a wide variety and complex list of controls to use in Creative mode, depending on where you’re building and what type of construction you’re aiming at. While the above part of the article covers the basic controls and How-Tos of Creative, if you need a little more fine-tuning to your creations, some advanced controls will help.
There’s a list of controls to the left of the screen that can be accessed when you are using one type of element or object. However, in the Settings, under the controls section, you can find a detailed list of controls that you can use in Creative mode, depending on what you need.
Players can also use the Grid Snap feature to ensure that their props and structures snap to the Grid tiles on the map allowing them to place objects evenly apart. This will help if you don’t want them to overlap or to be placed at unequal distances. The first setting under this tab is 16 which places objects right next to the previously placed objects. The next setting is 2 which leaves a relatively larger gap between the items but allows them to line up evenly spaced.
Devices

At this stage, you can begin placing devices on the map. These are elements that players can interact with, such as chests. They can be tweaked to work the way you wish and control how your game is played and what type of game is played on your Island.
Devices are placed similar to props. They are added to your Quick Bar, from where you can select them and place them as you wish. After placing a device, you can point your AR phone to ‘Customize’ it and select how the device functions.
Creating Billboards
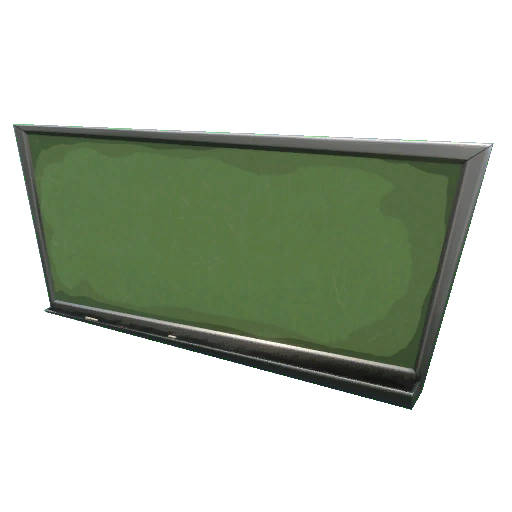
Billboards are a type of device that can be used to show small text messages to players on the Island. These are best used to show suggestions, and to provide instructions to players on how the game works. The character limit is 150 for each Billboard, however, there is no limit to the number of Billboards that you can place on the Island.
They can be found in the Devices tab. Search for a Billboard and add it to your inventory. After selecting the Board, you can use the AR Phone to position it and place it on the map to your liking. Once it’s placed, you can move closer to interact with the Board, and you will see the ‘Customize’ option.
In the Device options for a Billboard, you can set the font to a specific type, with options for outlines, text size, alignment, etc.
Depending on your requirements in the game, you can fiddle with the settings here and the types of Billboards you want to have on your map.
The Quick Menu
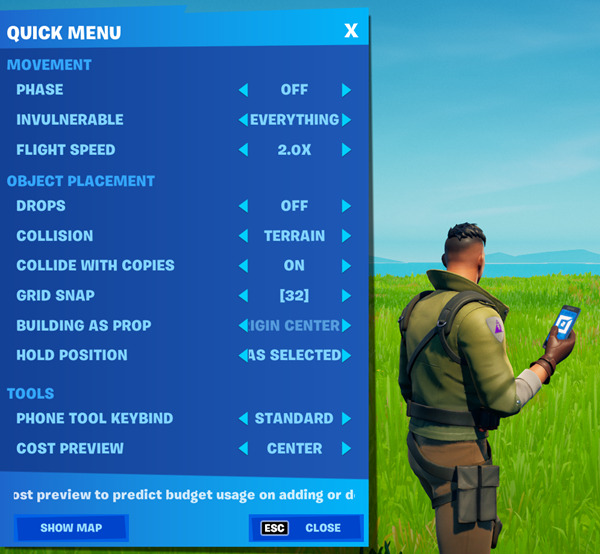
The quick menu also offers a fine-tuning of the controls and options required for building on your island. For example, you can increase or decrease your flight speed, depending on how fast you want to move across your map, or how much finesse you want in placing elements and objects on the map.
Similarly, the option to phase allows you to move through elements and constructions in the map. This is particularly useful when covering large distances on your island since you don’t have to move through buildings or go through the hassle of opening doors etc.
The building to prop toggle manages whether the gravity effects in Fortnite building are relevant when placing props. So, if you build a structure when the option is on, removing the base of the structure will make the entire construction destruct. However, if the toggle is set to ‘Off’, then you can place props wherever you like, even floating, and the destruction of the base of a structure will not affect the elements above it and they will remain intact.
You can also fine-tune for collisions in the Quick Menu to specify whether the props and elements on your island collide with each other or cannot collide when you place them on the map. Similarly, you can select whether your props collide with the terrain or grid when placing them. This is particularly useful when you want to phase half of some prop through a terrain block.
Memory Used
As you progress and build further on your Island, you will use up more and more of the memory available for that specific Island. You can track this memory usage from the bar that appears on the top of the screen that says ‘Memory Used’.
Match Settings
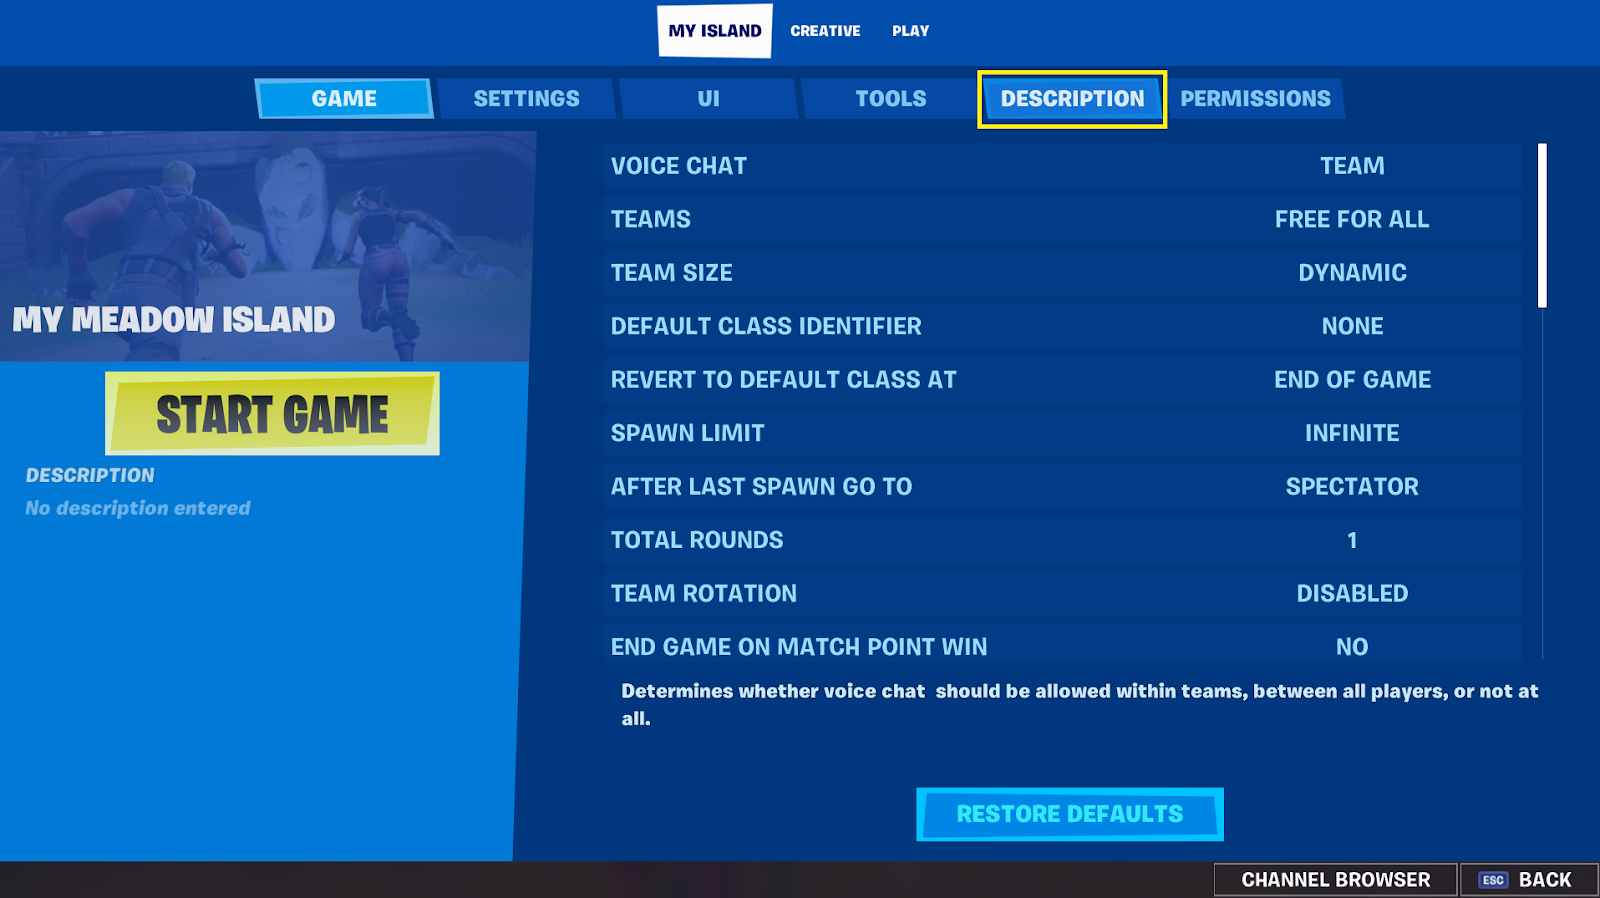
After completing the placement of objects and elements on the map, under the Match Settings players can find the My Island tab. Here you can tune how players entering the Island interact with it, including how the players spawn and their division into teams, how long the game runs for (whether it is time-bound, or decided at the end of a set number of rounds), and how the game mode accommodates for damage and other such modifiers, that you can tweak to your liking.
Publishing a Map
If you’re already a Creator for Fortnite and have a Creator Code, it’s easy to publish an Island. Once you’re done creating a map completely, you can go into the Description of the map under My Island and fill out all of the relevant details. Here you can also add tags and photos for the type of mode or game you have created. Now you can go to tools and publish the map. You will be given the link and Island Code for your Island.
If you don’t have a creator code, you’ll need to go about publishing the long way. First, you will want to make sure your map fulfills the guidelines and tips that Epic Games provides for Creative Submissions. These can be found here. Next, you need to head to the Creative Submission page. On the Creative Submission Page, make sure the memory used for the map is under 35000. Now, you can start filling out the details and descriptions for your creation and how people can play. Under the Island Code field, put in ‘No Publishing Rights’.
Make sure your Map is the best possible product you can send in because Epic Games will only accept one submission per Epic Games Account per week.
FAQs
Question: Can I play with my Friends on any Map?
Answer: You can invite players to play together in Creative Mode. Invite them to Party from the Friends List to get started. However, make sure that the Map that you’re inviting them to is set to Public or Friends Only for them to be able to join.
Question: How do I join a Public Island?
Answer: To join a publicly available map, you first need the Map Code specific to that map. Next, you can head to the Hub and go to any Map. You’ll see an option to change the destination. You can interact with this and enter the code specific to that map.
Question: Do I need to worry about saving my progress constantly?
Answer: No, you’re all good. Every Map you work on will be automatically saved in the Creative Server. You don’t need to worry about losing progress. However, make sure to come to check up on a Map if you quit abruptly, at least within 4 hours, since the server will keep your progress saved only for that long, at one time.
Question: Can I make money by creating maps?
Answer: Yes, you can make money through Fortnite Creative. As a creator, you will earn 5% of the proceeds from the skins that are sold from the players that use the Support-A-Creator code. However, this option is available only to certified Creators.
Conclusion
It’s best to keep in mind that the prefabs and starter Islands are great for beginners starting in Creative. Intermediate and Expert level creators can choose Grid Island to have complete freedom in designing their Island.
The AR Phone is the key tool in editing and interacting with elements, Devices, and props. It can change how the objects appear, how they are placed, and their appearance.
Flying after a double-tapping jump will allow players to move quickly through the map. A flying speed of 1-2x is ideal for starting out in creative and learning how the mechanic’s function. if you’ve made a lot of structures and placed several props and elements on the map, then phasing through them is also very convenient when inspecting or editing the Island.
You’ll create your own style of map and your own artistic touch to the Islands you make. However, some of these tips can help you reach and figure out your style much quicker. For example, if your game requires directions and arrow indicators, you can use the sprays to mark various things on the map, from the suggested movements, to zones on the map or checkpoints, depending on how your game works.
Setting up Billboards to show text and give suggestions, directions, information, etc. to players can also be a helpful way to make your map faster and more fun to play, as players climb the learning curve faster.
Always remember to try new options and new elements in Creative and see how the different customizations can suit your style of game mode.
Happy creating!